Web UI
Package name: intrudect-web
The Web UI collects alerts from agents and provides search and export capabilities for the gathered data. It supports notification delivery via webhooks and e-mail, imports IOC data from MISP, and exports as JSON for Wazuh/Elastic.
Note
Command examples shown on page need to be executed in root shell
Note
If mariadb & rsyslog were installed as dependencies, they need to be enabled and started
MaxMind GeoIP
Install
- Ubuntu
apt install geoipupdate - RedHat https://github.com/maxmind/geoipupdate/releases
Setup
- Create free account in https://www.maxmind.com/
-
Add your AccountID and License key into
/etc/GeoIP.conf -
Add Editions to
/etc/GeoIP.conf: - Execute geoipupdate (NB it will take 1-2 minutes for your maxmind AccountID and LicenseKey values to populate inside their infrastructure)
- Add it to crontab as well
Database setup
-
MariaDB server should be already installed as a depency.
-
Create database and user
-
Allocate as much memory as possible to database.
In/etc/mysql/mariadb.conf.d/50-server.cnfor/etc/my.cnf.d/mariadb-server.cnf(RedHat) -
Restart MariaDB server after config change
-
Ensure start on boot
-
Load timezone tables into MariaDB
Verify that output is > 0
Configuration
Configuration file is in /opt/intrudect-web/config.json.
HOMEURLis used by agents to send alerts and request configuration changes.-
LISTENparameter specifies the IP address and port where the web UI listens, and you should forward your reverse proxy traffic to this location. Since the web UI itself does not have support for TLS, you must set up a reverse proxy, like Nginx or Caddy, in front of it in a production environment. -
DBrefers for MariaDB connection URI (refer to setup guide). MISPis used to receive IOC data (such as domains and destination IP addresses) from a MISP server, which is queried once per hour for specifiedTAGS.GEOIPfolder of geoip database files (Ubuntu -/var/lib/GeoIP/, RedHat -/usr/share/GeoIP/)HTTPSset totruewhen the web UI is behind a TLS-terminating reverse proxy. Ensures secure cookie flags and correct protocol handling.REMOTEIPthe HTTP header name that the reverse proxy uses to pass the client's real IP address (e.g.X-Real-Ip). Leave empty if not using a reverse proxy.WEBAUTHNenables passkey/hardware key authentication.RPIDis your domain name,RPORIGINSlists the allowed origins, andRPDISPLAYNAMEis shown to users during registration.LDAPenables Active Directory / LDAP authentication. When enabled, the login page shows a "Domain Login" tab alongside the local account login. See the AD/LDAP authentication section below for details.
{
  "HOMEURL": "https://example.com",
  "LISTEN": "127.0.0.1:8080",
  "TIMEZONE": "Europe/Tallinn",
  "HTTPS": true,
  "REMOTEIP": "X-Real-Ip",
  "DB": {
    "MYSQL": "mysql://intrudect:PASSWORD@tcp(localhost)/intrudect?charset=utf8mb4&collation=utf8mb4_unicode_ci",
    "TCPLOGMAXDAYS": 90,
    "DNSLOGMAXDAYS": 90,
    "DHCPLOGMAXDAYS": 90,
    "HTTPLOGMAXDAYS": 90
  },
  "GEOIP": "/var/lib/GeoIP/",
  "MISP": {
    "APIKEY": "",
    "URL": "https://misp.example.com",
    "TAGS": ["Cobalt Strike", "C2", "gophish", "evilginx"]
  },
  "WEBAUTHN": {
    "RPID": "yourdomain.com",
    "RPORIGINS": ["https://yourdomain.com"],
    "RPDISPLAYNAME": "Intrudect"
  },
  "LDAP": {
    "Enabled": true,
    "URL": "ldaps://dc.yourdomain.com:636",
    "BindPattern": "%[email protected]",
    "InsecureSkipVerify": false,
    "StartTLS": false,
    "GroupPrefix": "intrudect",
    "AutoProvision": true
  }
}
AD/LDAP authentication
The web UI supports authenticating users against Active Directory or an LDAP server. When enabled, users see a "Domain Login" tab on the login page. Local account login remains available alongside domain login.
LDAP configuration fields
| Field | Description |
|---|---|
Enabled |
Set to true to enable LDAP authentication. |
URL |
LDAP server URL. Use ldaps:// for TLS (port 636) or ldap:// for plain (port 389). |
BindPattern |
Template for constructing the bind identity. %s is replaced with the username. Use UPN format (%[email protected]) for Active Directory or DN format (uid=%s,ou=people,dc=example,dc=com) for OpenLDAP. |
InsecureSkipVerify |
Skip TLS certificate verification. Set to false (default) to verify certificates, true to skip verification. Only use true for testing with self-signed certificates. |
StartTLS |
Upgrade to TLS after connecting on a plain ldap:// connection. Has no effect when using ldaps://. |
GroupPrefix |
Prefix for AD/LDAP group names that control access. The web UI checks membership in {prefix}-admins and {prefix}-users groups. |
AutoProvision |
Automatically create a user account on first successful LDAP login. If set to false, an administrator must create the user locally before they can log in via LDAP. |
Active Directory groups
Create two security groups in Active Directory matching your configured GroupPrefix:
{GroupPrefix}-admins— members receive full administrator permissions{GroupPrefix}-users— members receive read-only permissions (except integrations)
For example, with "GroupPrefix": "intrudect", create groups intrudect-admins and intrudect-users. Users not in either group are denied access.
Note
Group membership is checked on every login. If a user's AD group membership changes (e.g. promoted from user to admin), the updated permissions take effect on their next login.
Example: Active Directory with LDAPS
"LDAP": {
    "Enabled": true,
    "URL": "ldaps://dc.corp.local:636",
    "BindPattern": "%[email protected]",
    "InsecureSkipVerify": false,
    "StartTLS": false,
    "GroupPrefix": "intrudect",
    "AutoProvision": true
}
Example: Active Directory with StartTLS
"LDAP": {
    "Enabled": true,
    "URL": "ldap://dc.corp.local:389",
    "BindPattern": "%[email protected]",
    "InsecureSkipVerify": false,
    "StartTLS": true,
    "GroupPrefix": "intrudect",
    "AutoProvision": true
}
Example: OpenLDAP with DN bind
"LDAP": {
    "Enabled": true,
    "URL": "ldaps://ldap.example.com:636",
    "BindPattern": "uid=%s,ou=people,dc=example,dc=com",
    "InsecureSkipVerify": false,
    "StartTLS": false,
    "GroupPrefix": "intrudect",
    "AutoProvision": true
}
Note
LDAP users can also enroll TOTP or WebAuthn as a second factor. When 2FA is configured, the user is prompted for their second factor after a successful domain login.
Start & enable service
Logfile
Web server writes additional info to /var/log/intrudect-web.log
Inital user
Before launching the web UI, an initial user and password must be created using the command-line utility.
cd /opt/intrudect-web
./intrudect-cli -cmd add -type admin -username <username> -password <passowrd>
Initial settings
- Define network names and address ranges in "Site->Networks"
- Review different module settings underr "Monitoring" menu.
- Authorized DNS servers "Monitoring->DNS"
- Authorized DHCP servers "Monitoring->DHCP"
-
Admin workstation addresses/subnets "Monitoring->Admin protocols"
-
Add alerting integrations under "Settings->Integrations"
Add agents
Point your browser to the web UI hostname and log in. Navigate to "Agents" and select the specific agent configuration from the menu.
After adding an agent, you can use "Download Config" to download its configuration file. This file now includes the agent’s login credentials for the web UI. Save the configuration file on the server where this particular agent is running.
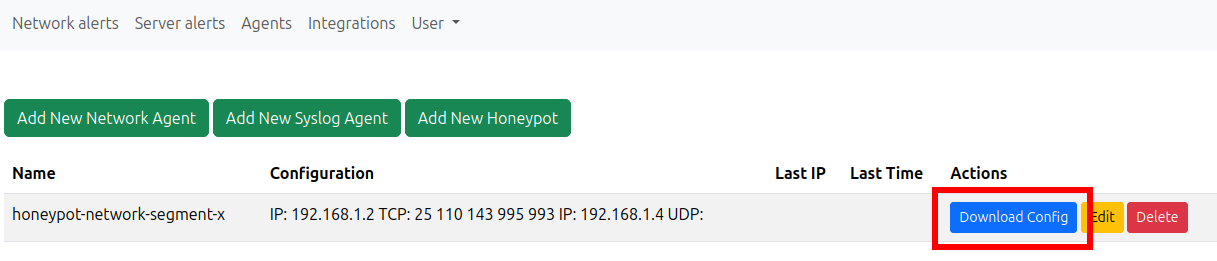
Configuration files are located at /opt/intrudect-<agentname>/etc/config.json
Adding external communication platforms
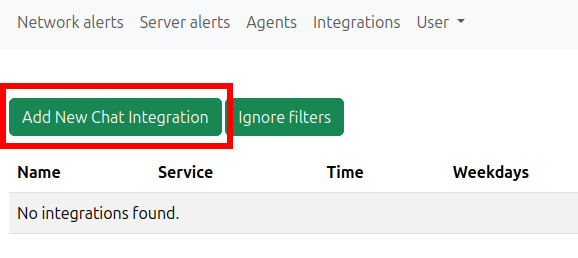
The web UI supports alert delivery to external channels via webhooks and e-mail. This allows users to receive real-time notifications based on their defined rules.
Wazuh integration (optional)
- Install Wazuh agent into the server.
-
Append to
/var/ossec/etc/ossec.conf -
Restart Wazuh agent
-
On the Wazuh server, create a rule group and rules in the file:
/var/ossec/etc/rules/local_rules.xml
For example, one rule to catch all events:Or multiple rules with custom levels:<group name="intrudect"> <rule id="100010" level="12"> <decoded_as>json</decoded_as> <field name="type">useragent</field> <description>$(description)</description> </rule> </group>
PossibleTYPEvalues:honeypot,egress,dhcp,ioc,tor,arp,dns_txt,dns_ptr,dns_a,dns_aaaa,dns_dga,dns,ldap,portscan,smb,useragent,adm_protocol,newdevice,n2n,pwd_brute<group name="intrudect"> <rule id="100010" level="12"> <decoded_as>json</decoded_as> <field name="type">TYPE1</field> <description>$(description)</description> </rule> <rule id="100011" level="12"> <decoded_as>json</decoded_as> <field name="type">TYPE2</field> <description>$(description)</description> </rule> / ... / </group> -
Restart Wazuh